The Web Studio is only meant as a generalized solution for generating simple 3D masks / filters. Its not a full modeling environment and as such requires external resources to be imported into it. It is currently in Beta.
Banuba AR Web Studio includes a number of samples / templates by default to assist you in getting acquainted with it and to start rapidly making your own effects.
Important!: The effects from web studio are incompatible with our Unity SDK
Getting Started:
Home

On the home screen you’ll be met with options to create a New Project or Open an Existing one.
Each effect that has been created via the Studio is an effect and a project in and of itself. Only filters/masks/effects that have been created in the Studio can be opened in it.
Below you will find a number of templates. Each of them is an example of how to setup an effect in that style. If you hover over the template you will see a small description about it, each of them can also be saved as is in order to study the resulting files.
Menu
On the left side of the screen you'll see a panel that will pop-up when hovered over.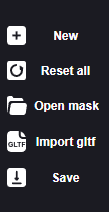

New - return to the main screen
Reset all - reset all scene settings
Open - open a finished project with a mask/filter/effect
Import glTF model - import a glTF model into the studio scene to continue working on it. Most 3D modeling suits have an option for that or a plugin.
Save - save the project for further use in your projects
Store - content store, here you can buy our pre-developed masks, backgrounds, try-on content, and much more to be used as is with the SDK, often saving time and resources.
Tutorials - Banuba Web AR Studio documentation
Feedback - if you have some difficulties this button allows you to contact our Support Team
Preview Area
The middle of the screen you will have a large area which defaults to the Viewer tab.Viewer - if you have you web-camera turned on, this tab will display a live feed from the camera and simulate the application of the current effect/mask to you.


Viewer Settings - at the top right corner of the Viewer you’ll see a number of options:
![]() - sets the Viewer to the webcam view.
- sets the Viewer to the webcam view.
![]() - allows you to select a preloaded static image to apply the mask/effect to, or load an image from your drive.
- allows you to select a preloaded static image to apply the mask/effect to, or load an image from your drive.
![]() - allows you to select a preloaded video to apply the mask/effect to, or load a video from your drive.
- allows you to select a preloaded video to apply the mask/effect to, or load a video from your drive.
![]() - allows you to change the resolution being rendered for the preview between the common 16:9, 9:16, 4:3, and 1:1.
- allows you to change the resolution being rendered for the preview between the common 16:9, 9:16, 4:3, and 1:1.
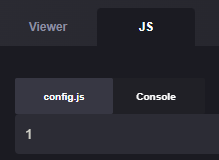
JS - this tab provides the ability to provide custom JS for the effect (please reference our various demo effects) as well as to view the console output for debugging this custom JS.
Effect Configuration
RENDER MESH
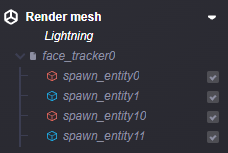
If you have a .gltf file or more imported, you will be able to see additional options that will display that you can select to configure in ore detail via **Properties** on the right of your screen.Below is an example for the "Face Decoration Template" with "Lighting" selected
BEAUTIFICATION
Face Shape - alters the shape of the face;
Retouch - adjust skin smoothness, or teeth whiteness level;
Hair color - recolors hair via neural network assistance;
Lips color - recolors the lips and adds shine via neural network assistance;
Eyes color - recolors the iris of the eye via neural network assistance.
ENVIRONMENT
Background - adds real-time background separation and allows you to load a custom background texture
Foreground - overlays a texture on top of the camera image (stretches to the resolution). Has blending options that are selectable in Properties
COLOR CORRECTION
LUT’s - allows you to apply color correction via LUT files. You can use either premade ones (please reference our tutorial) or load a custom one.
Camera shaders - superimposes a shader based image distortion of your choice to the effect.